Custom Integration Node
In this section, we will explore the Custom Integration Node, a powerful tool within Buzzeasy that enables you to interact with external systems or databases. This node makes an HTTP POST request to a user-defined endpoint, carrying conversation metadata and the current workflow data (key-value pairs).
Setting Up the Custom Integration Node
You can set up the Custom Integration Node in the Buzzeasy workflow editor. Follow these steps:
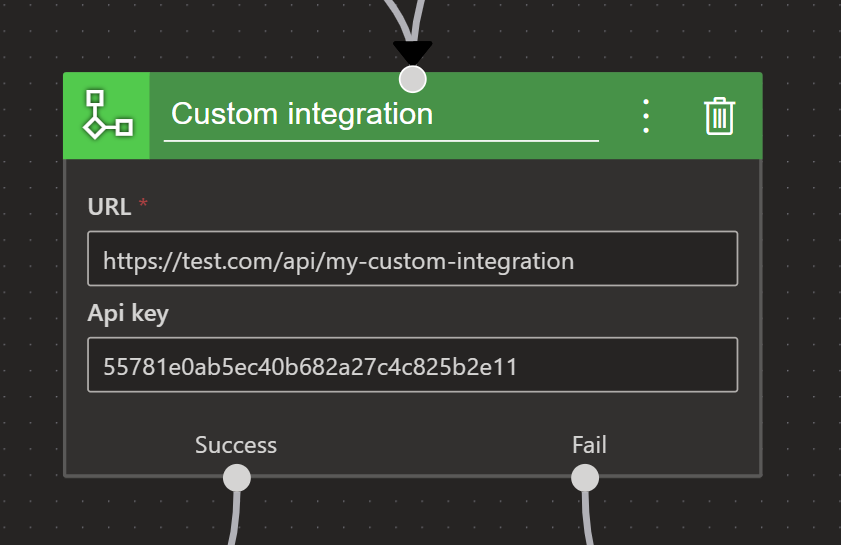
- Add the node named "Custom Integration" to your workflow.
- Configure the following parameters for the node:
URL: This is the endpoint that Buzzeasy will call when the workflow execution reaches the Custom Integration Node.
API Key: This is a secret key generated by you. Buzzeasy will include this key in the x-api-key HTTP header when it makes the POST request. You can validate this key on your server to ensure the request is from Buzzeasy.
Understanding the Request
The HTTP POST request sent by Buzzeasy contains a JSON object with the following properties:
- 'workflowData': This is an object that holds the current workflow data as key-value pairs.
- 'customerIdentifier': This is a string that represents the customer's identifier (such as an email address). It can also be null.
- 'customerId': This is a string that represents the unique ID of the customer. It can also be null.
- 'channelType': This is a string that represents the type of channel used for the conversation (like Email, Voice, etc.).
- 'conversationId': This is a string that represents the unique ID of the conversation.
The channelType and conversationId properties are required. Here is an example of the request body:
{
  "$schema": "http://json-schema.org/draft-07/schema#",
  "type": "object",
  "properties": {
    "workflowData": {
      "type": "object",
      "additionalProperties": {
        "type": "string"
      }
    },
    "customerIdentifier": {
      "type": ["string", "null"]
    },
    "customerId": {
      "type": ["string", "null"]
    },
    "channelType": {
      "type": "string"
    },
    "conversationId": {
      "type": "string"
    }
  },
  "required": ["channelType", "conversationId"],
  "example": {
    "workflowData": {
      "key1": "value1",
      "key2": "value2"
    },
    "customerIdentifier": "test@test.com",
    "customerId": "6d820576a3864160a715312b4e9ac376",
    "channelType": "Email",
    "conversationId": "48fad19d15104c8fbd7344853f35019e"
  }
}public class CustomIntegrationData
{
public Dictionary<string, string> WorkflowData { get; set; } = new();
public string? CustomerIdentifier { get; set; }
public string? CustomerId { get; set; }
public string ChannelType { get; set; } = null!;
public string ConversationId { get; set; } = null!;
}Formulating the Response
Your server should respond with a JSON object that contains the updated or added workflow data. This data will be used to update the workflow data on Buzzeasy's side. The HTTP response status should be 200 OK.
Here is an example of the response body:
{
    "key1": "value1",
    "key2": "value2"
}